Why Gravel Patios Deliver $3,000 Backyard Magic
Homeowners often seek ways to enhance their outdoor spaces without excessive costs or complications. Gravel patios provide an ideal solution, combining affordability with enduring style. For approximately $3,000 and a single weekend of work, you can install a durable surface that integrates seamlessly with various home designs, from sleek modern to relaxed rustic.
This approach suits diverse settings, particularly in California where indoor-outdoor living thrives. Gravel allows for fluid layouts that accommodate furniture, pathways, and plantings. Beyond aesthetics, it promotes sustainability by using natural materials that require minimal upkeep over time.
Planning Your $3,000 Gravel Patio Project
Effective planning forms the foundation of a successful gravel patio. Focus on preparation to maximize your budget and achieve a professional result. Consider these key steps to align the design with your lifestyle and site conditions.
Define the Space's Purpose
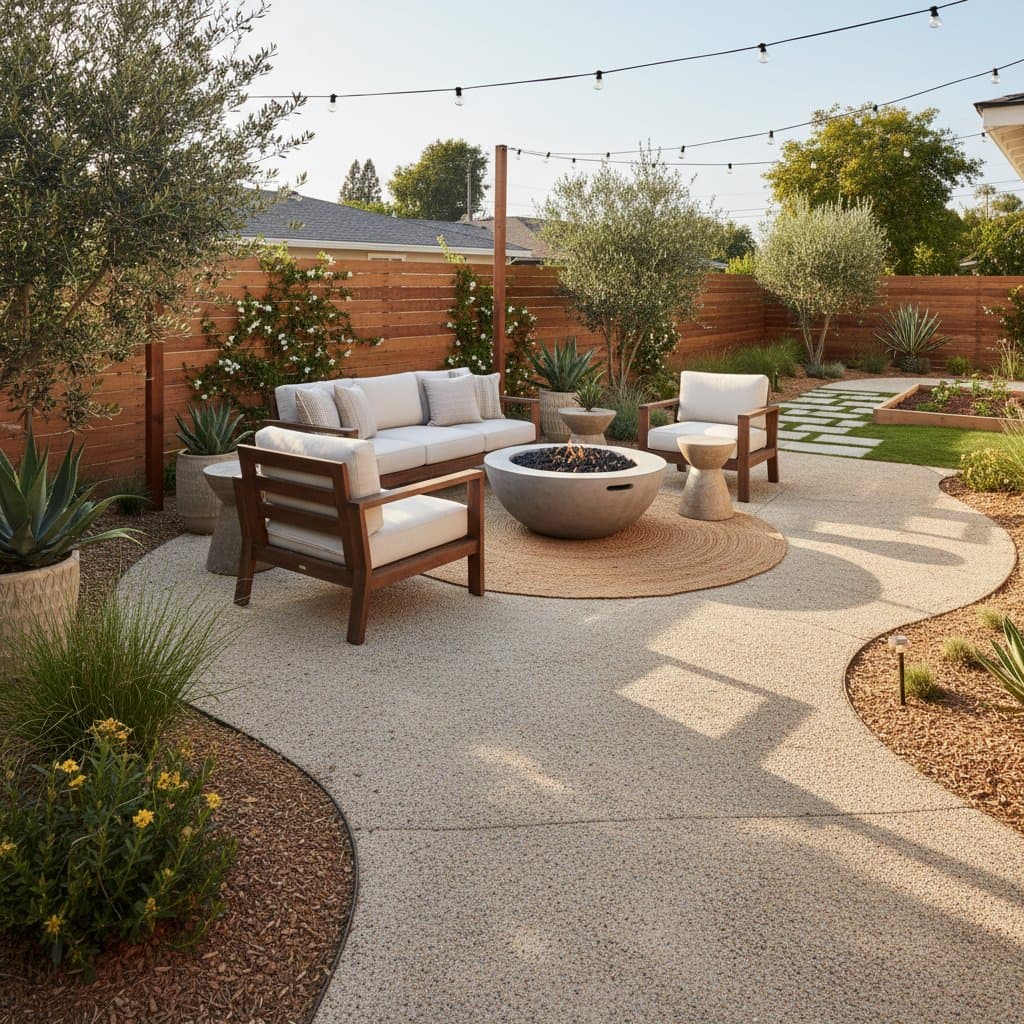
Determine the primary activities for the area. For an outdoor dining setup, allocate at least 10 by 12 feet to fit a table and chairs comfortably, ensuring 36 inches of clearance around edges for movement. If designating a fire pit zone, position it centrally with 8 to 10 feet of surrounding gravel to allow safe seating distances of at least 3 feet from the fire.
A meditation corner might require a smaller, 6 by 8 foot space shaded by plants or a pergola. Sketch initial ideas on graph paper, scaling 1 inch to 1 foot, to visualize proportions and avoid common sizing errors.
Select an Optimal Location
Choose a site that receives balanced sunlight throughout the day. Areas with partial shade from trees or structures prevent overheating during summer afternoons, enhancing usability. Proximity to the house, such as adjacent to sliding doors, facilitates easy access for meals or gatherings.
Evaluate drainage patterns to avoid low spots where water pools. Test by observing rainfall or using a hose; the ground should slope gently away from structures at a 1 to 2 percent grade. This prevents erosion and keeps the patio dry.
Allocate Your Budget Wisely
Break down the $3,000 into essential categories for transparency and control. Prioritize foundational elements like the base and materials, which directly impact longevity.
- Base materials (sand and crushed rock for stability): $800
- Gravel (10 tons for a 200-square-foot area at $90 per ton): $900
- Landscape edging (plastic or metal borders): $250
- Weed barrier and tools (fabric, rake, tamper): $150
- Rental equipment (plate compactor) or professional labor: $400
- Initial furnishings (bistro set or cushions): $500
Adjust based on DIY versus hired help. For example, renting a compactor for $100 per day saves on labor if you handle the installation yourself. Source materials from local suppliers to reduce delivery fees, often 10 to 20 percent of costs.
Selecting the Ideal Gravel for Your Patio
The choice of gravel influences texture, stability, and visual harmony. Evaluate options based on intended use and regional availability. Each type offers unique benefits for comfort and durability.
Pea Gravel for Soft, Natural Appeal
Pea gravel consists of small, rounded stones about 3/8 inch in diameter. This variety provides a cushioned surface suitable for lounging areas or paths where barefoot walking occurs frequently. Its loose nature allows water to drain quickly, reducing mud after rain.
However, it may shift under heavy furniture, so pair it with stable edging. In coastal California landscapes, neutral tones like river-washed pebbles enhance a serene, beach-inspired vibe.
Decomposed Granite for Firm, Dust-Controlled Surfaces
Decomposed granite (DG) breaks down into fine particles that compact into a solid yet permeable layer. Ideal for dining patios or high-traffic zones, it supports stable furniture placement after stabilization with a resin binder. Apply 4 inches of depth, then compact in layers for best results.
Sealing DG creates a low-dust finish that resists erosion. Earthy hues, such as stabilized tan or gray, complement valley or foothill homes, blending with native plantings for an eco-conscious look.
Crushed Stone for Structured Stability
Crushed stone features angular fragments that interlock when compacted, forming a firm base resistant to shifting. Use 3/4-inch minus sizes for patios needing definition, like around fire features. This option excels in modern designs, providing clean lines and minimal settling.
Darker aggregates, such as basalt or granite chips, add contrast in sunny exposures. Ensure even distribution to avoid uneven wear, and incorporate it in borders for defined edges.
Effortless Maintenance Strategies
Gravel patios demand far less attention than concrete or wood alternatives. Regular, simple routines preserve appearance and functionality with minimal time investment. Address issues promptly to extend the surface's life.
Routine Surface Care
Rake the area weekly to level displaced stones and remove debris. Use a stiff garden rake for pea gravel to redistribute evenly without displacing the base. For compacted types like DG, a leaf blower clears light dust after storms.
Inspect for erosion around edges monthly, especially after heavy rains. Replenish any thin spots with matching gravel to maintain a uniform 3 to 4 inch depth.
Weed and Pest Management
Install a geotextile fabric beneath the gravel during setup to suppress weeds long-term. If sprouts emerge, hand-pull them immediately, targeting roots to prevent regrowth. Natural solutions like diluted vinegar sprays control isolated patches without chemicals.
Monitor for ants or burrowing pests; a light dusting of diatomaceous earth deters them effectively. These methods keep the space inviting and reduce the need for major interventions.
Long-Term Upkeep
Every two years, add a 1/2 inch top layer of gravel to refresh color and fill voids from settling. Budget $200 to $300 for this refresh, depending on area size. Professional resealing for stabilized surfaces every three to five years enhances weather resistance.
Secure edging annually by driving stakes deeper if needed. These practices ensure the patio remains a low-effort feature that ages gracefully.
Bringing Your Gravel Patio to Life
Installing a gravel patio requires methodical steps for optimal results. Begin with site excavation to 6 inches deep, removing sod and roots. Layer 2 inches of crushed rock base, compact it firmly, then add weed fabric and gravel.
Use a plate compactor for even settling, working in sections. Edge with metal or stone for crisp boundaries that prevent spreading. Once set, arrange furnishings to define zones and add lighting for evening use.
This project yields a versatile outdoor haven that boosts property appeal. It embodies sustainable design by reusing excavated soil for gardens and minimizing resource use. Enjoy the tactile crunch underfoot as you host gatherings or unwind, transforming everyday backyards into cherished retreats.